实验1
下载-2025春计算机网络实验指导书-1
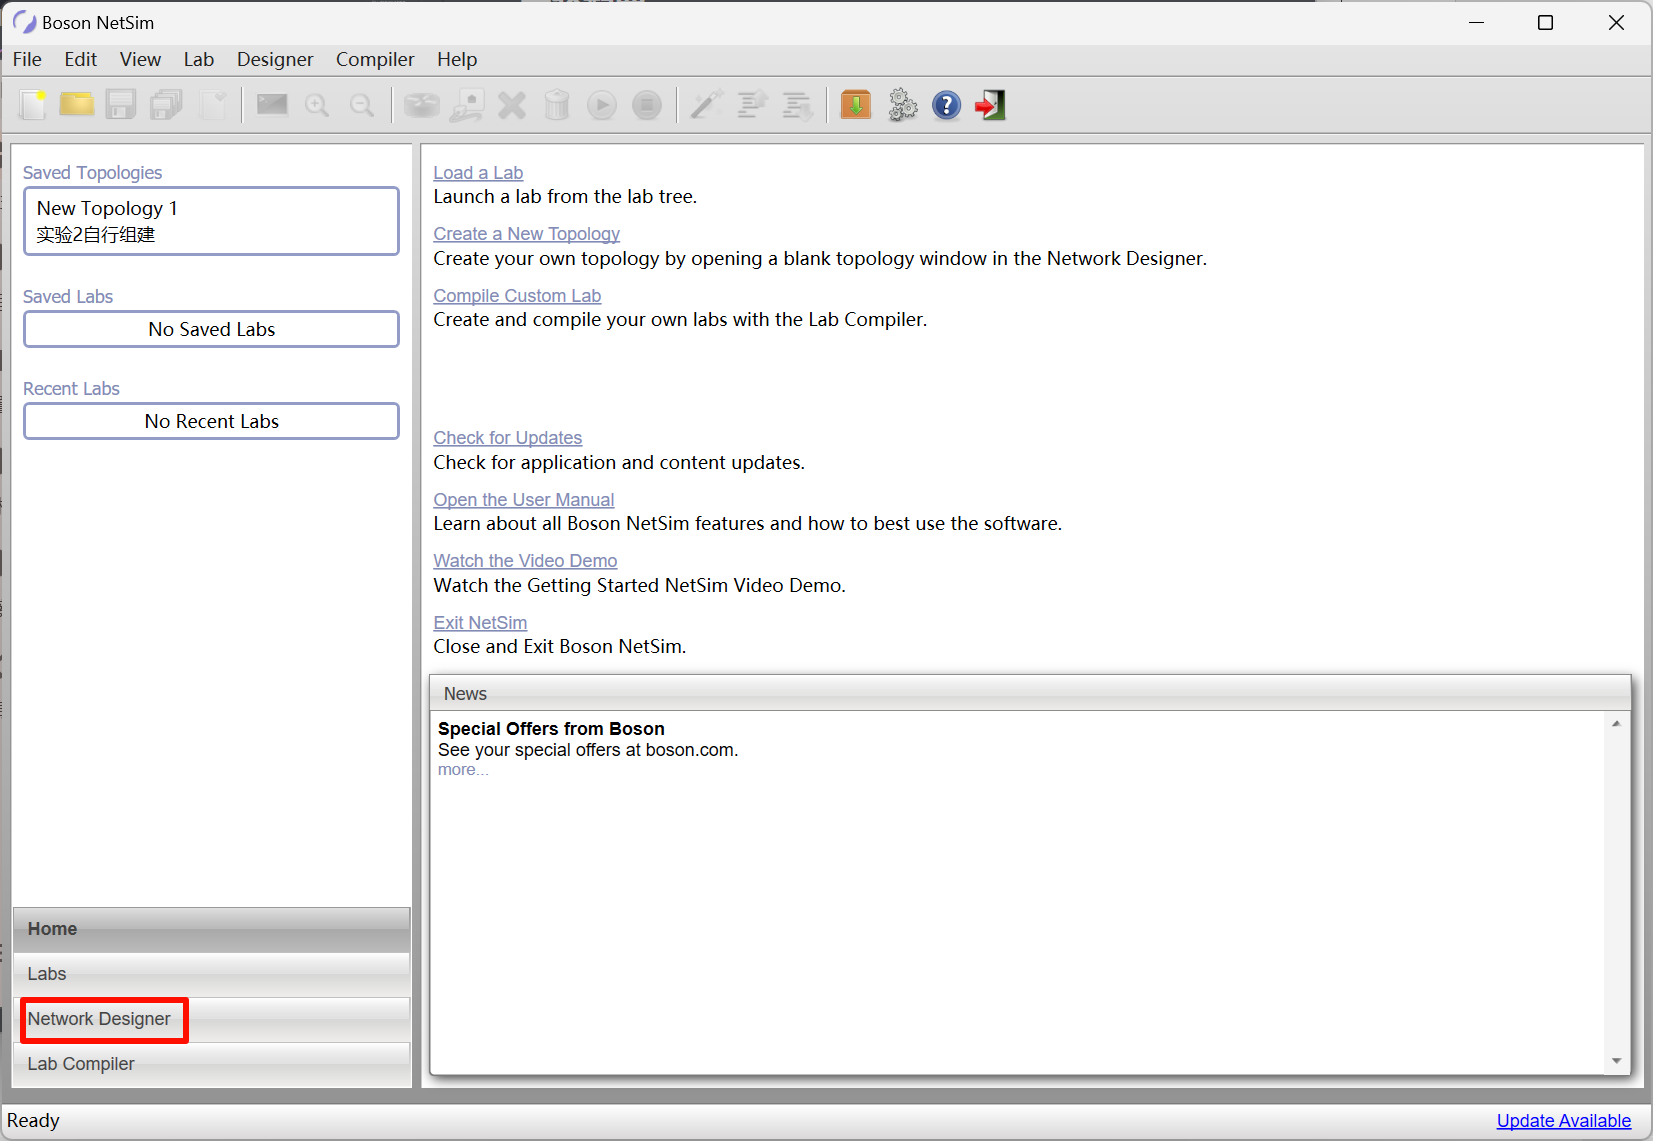
Boson NetSim 10 本地安装
下载地址
百度网盘
onedrive
解压
得到三个文件 Setup为主程序安装文件
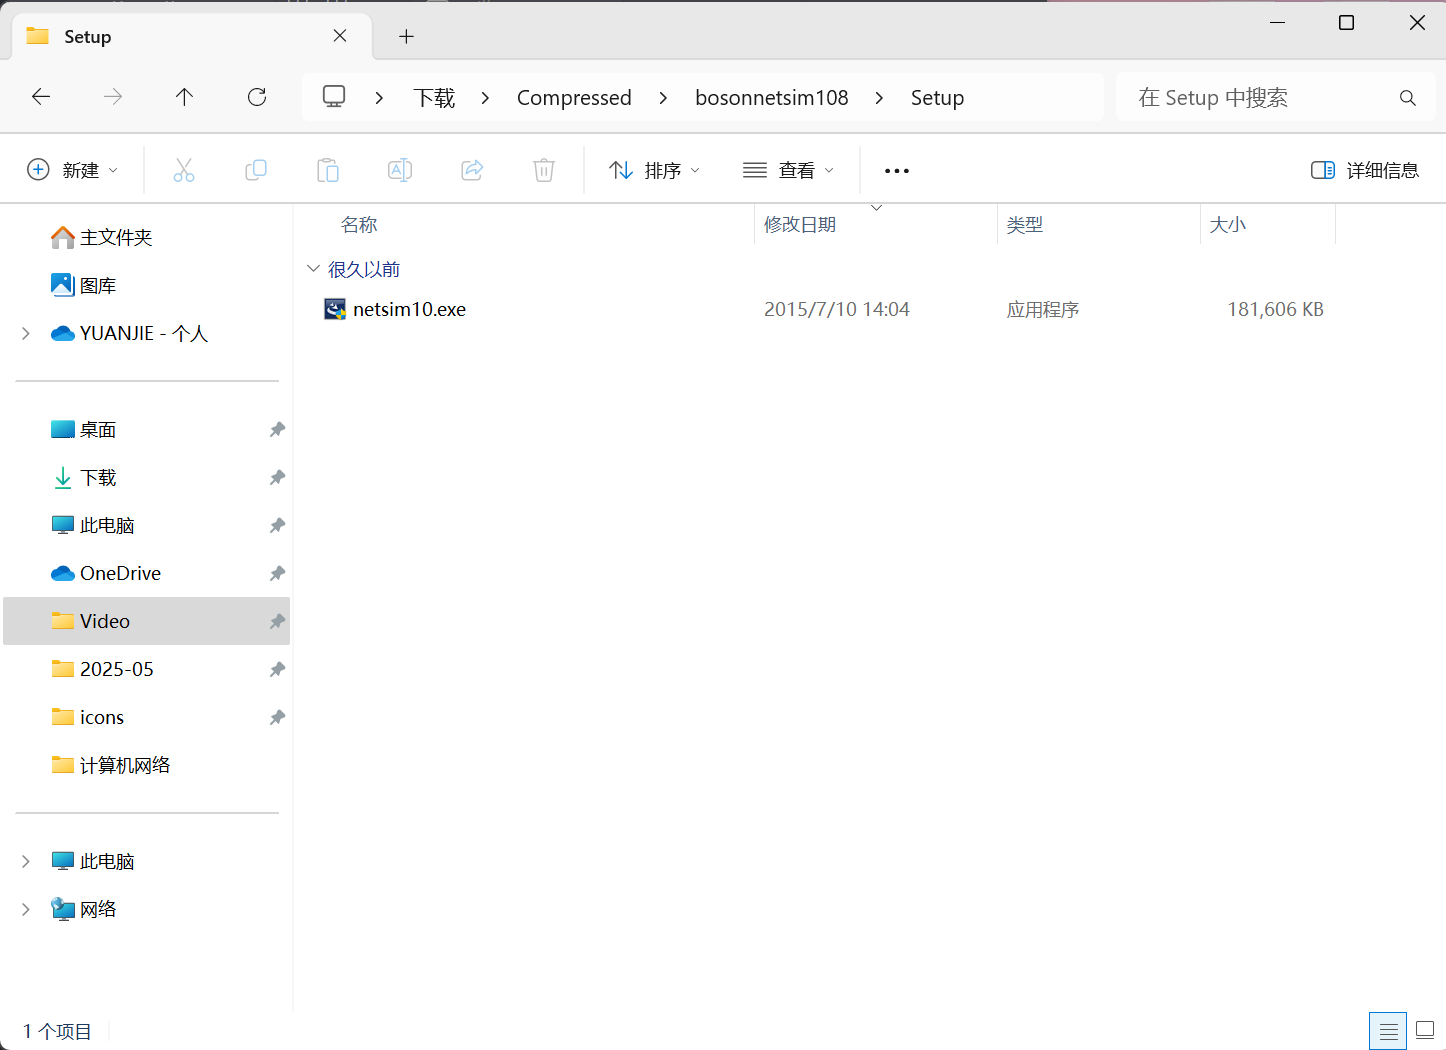 Patched
 Mscon43demo.zip为修改破解文件
安装
点击netsim10.exe 进行安装
推荐安装到C:\Boson目录中 不然会出现%Incomplete command问题
二次解压
解压Mscon43demo.zip
得到mscon43demo.dll文件

修改破解
把mscon43demo.dll复制到C:\Boson,
C:\ProgramData\Boson Software\Boson Netsim10\mscon43demo.dll,两个位置,进行替换与粘贴

把Patch目录下的三个文件复制到C:\Boson中,进行替换。

运行
进入C盘C:\Boson 右键图标发送快捷方式至桌面
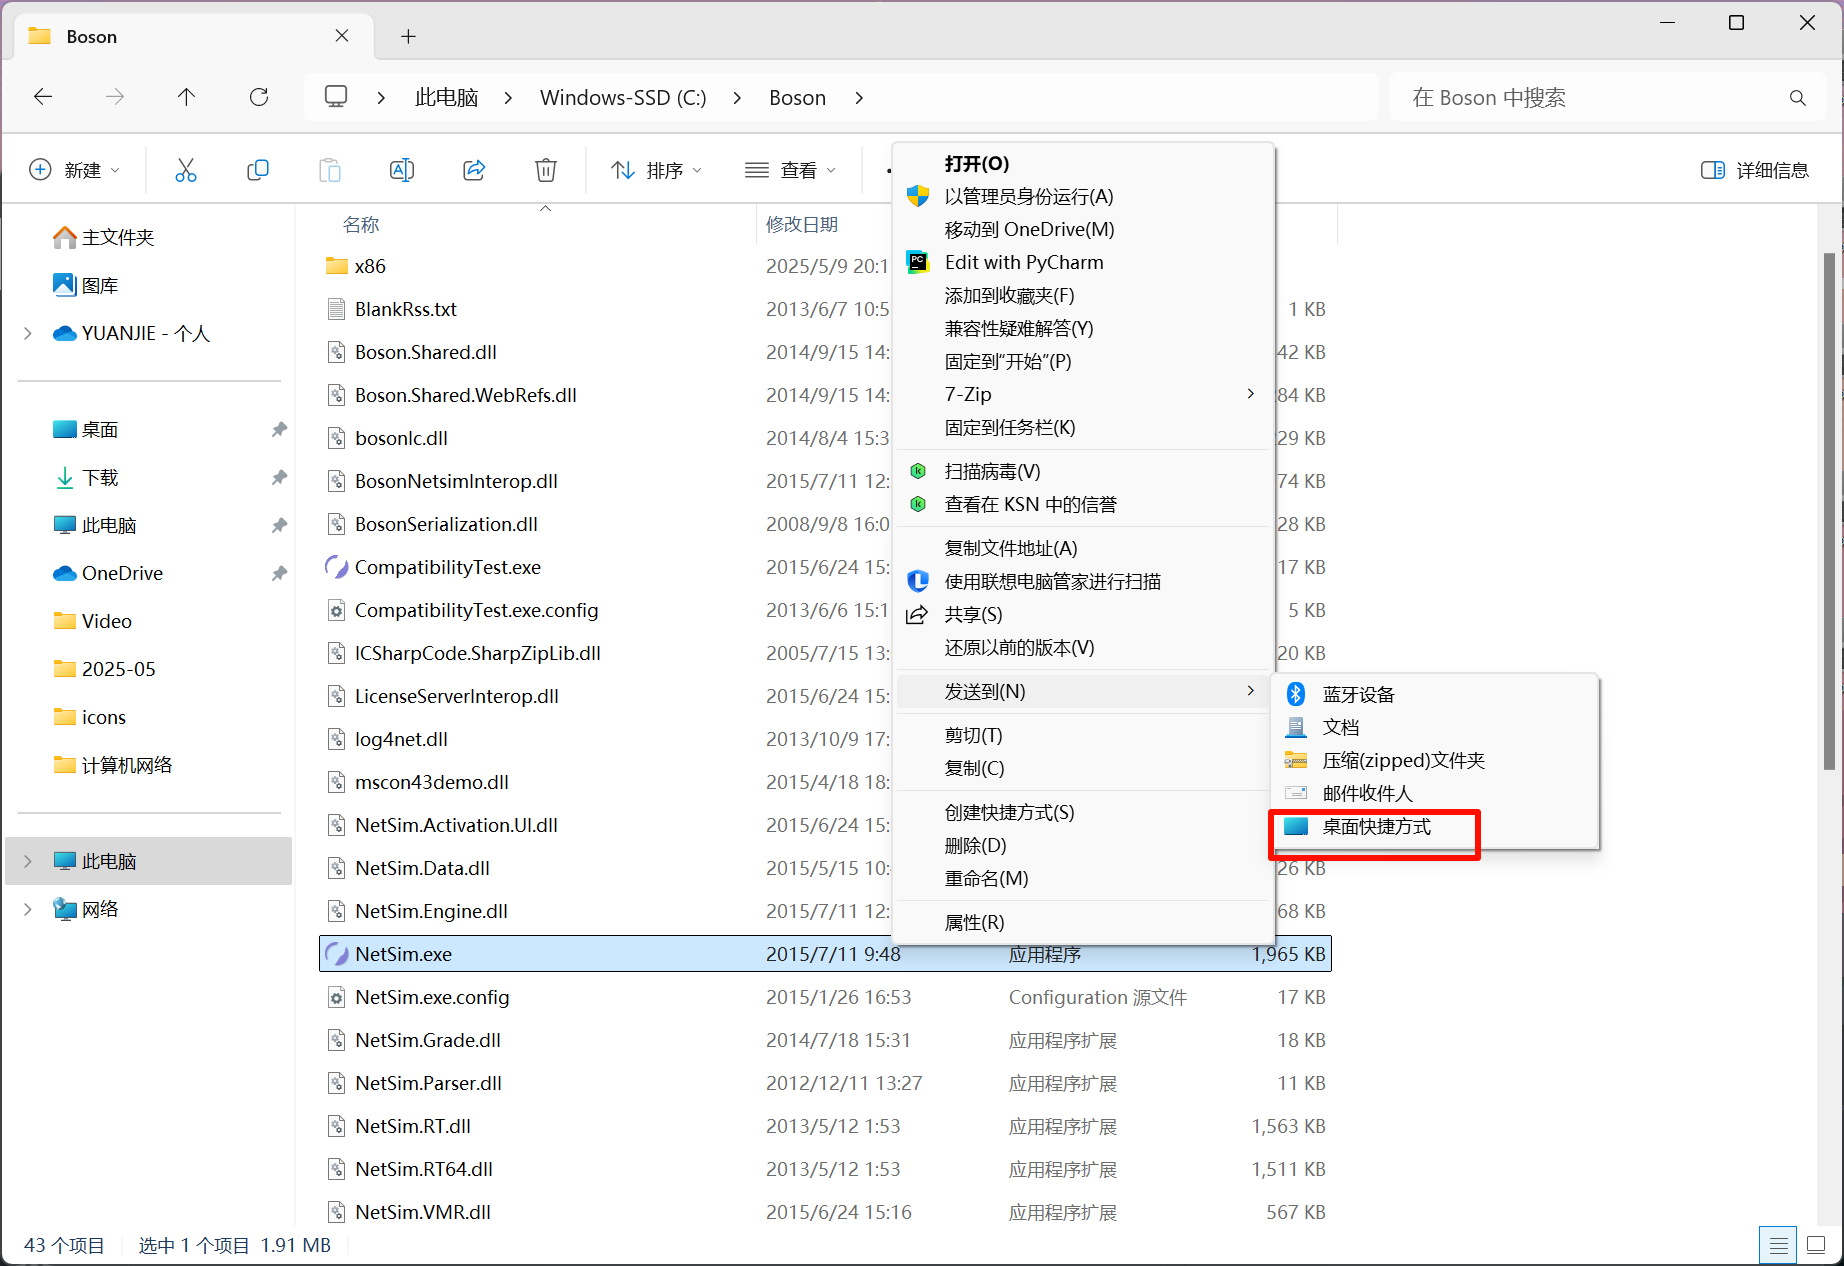 点击桌面图标运行Boson NetSim 10
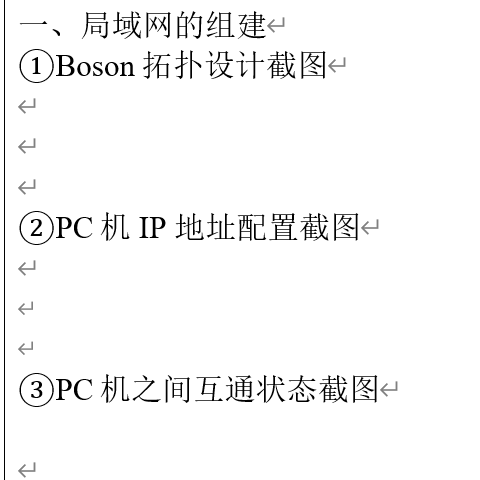
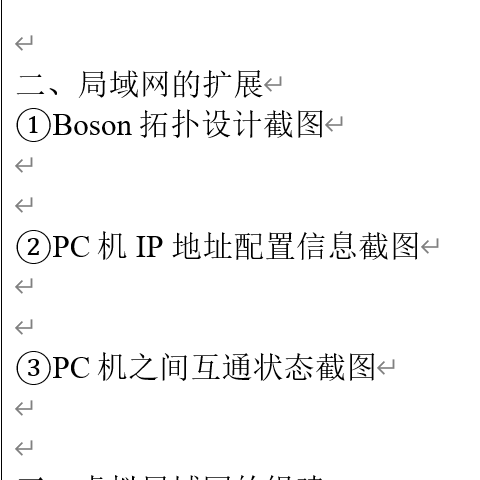
局域网组建
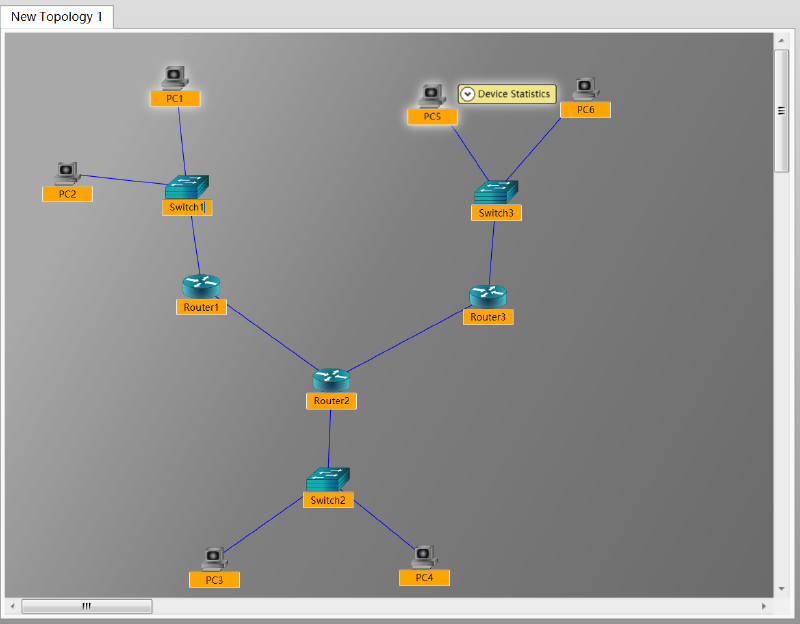
模型组建
局域网组建
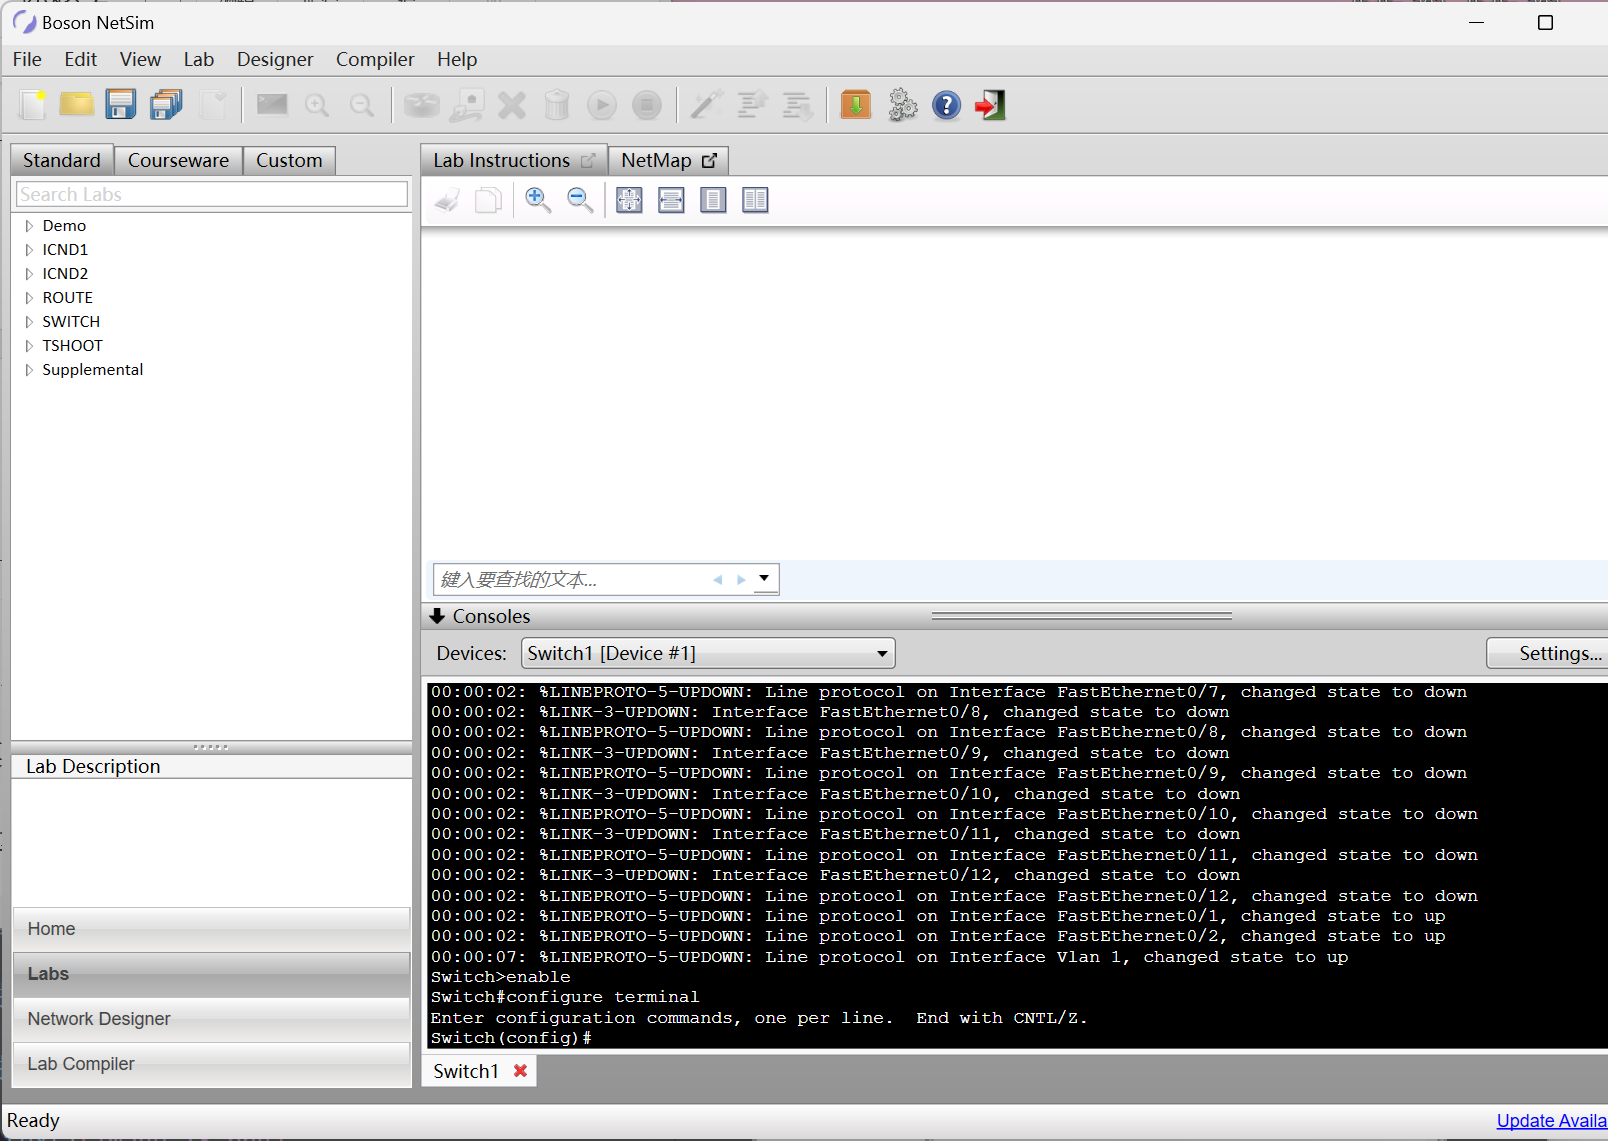
点击左下角Network Designer进行配置
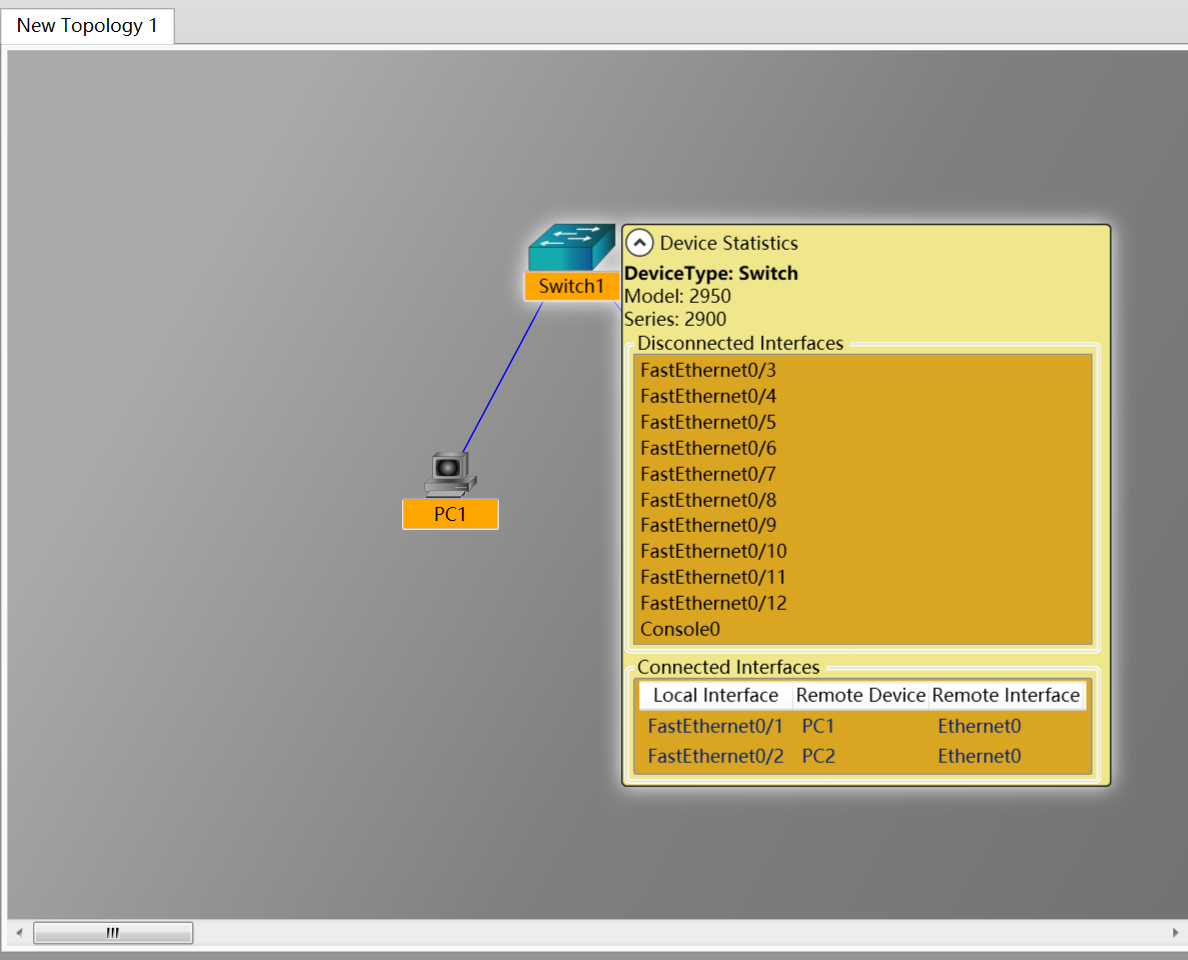
 在左侧拖拽一台switch交换机两台pc
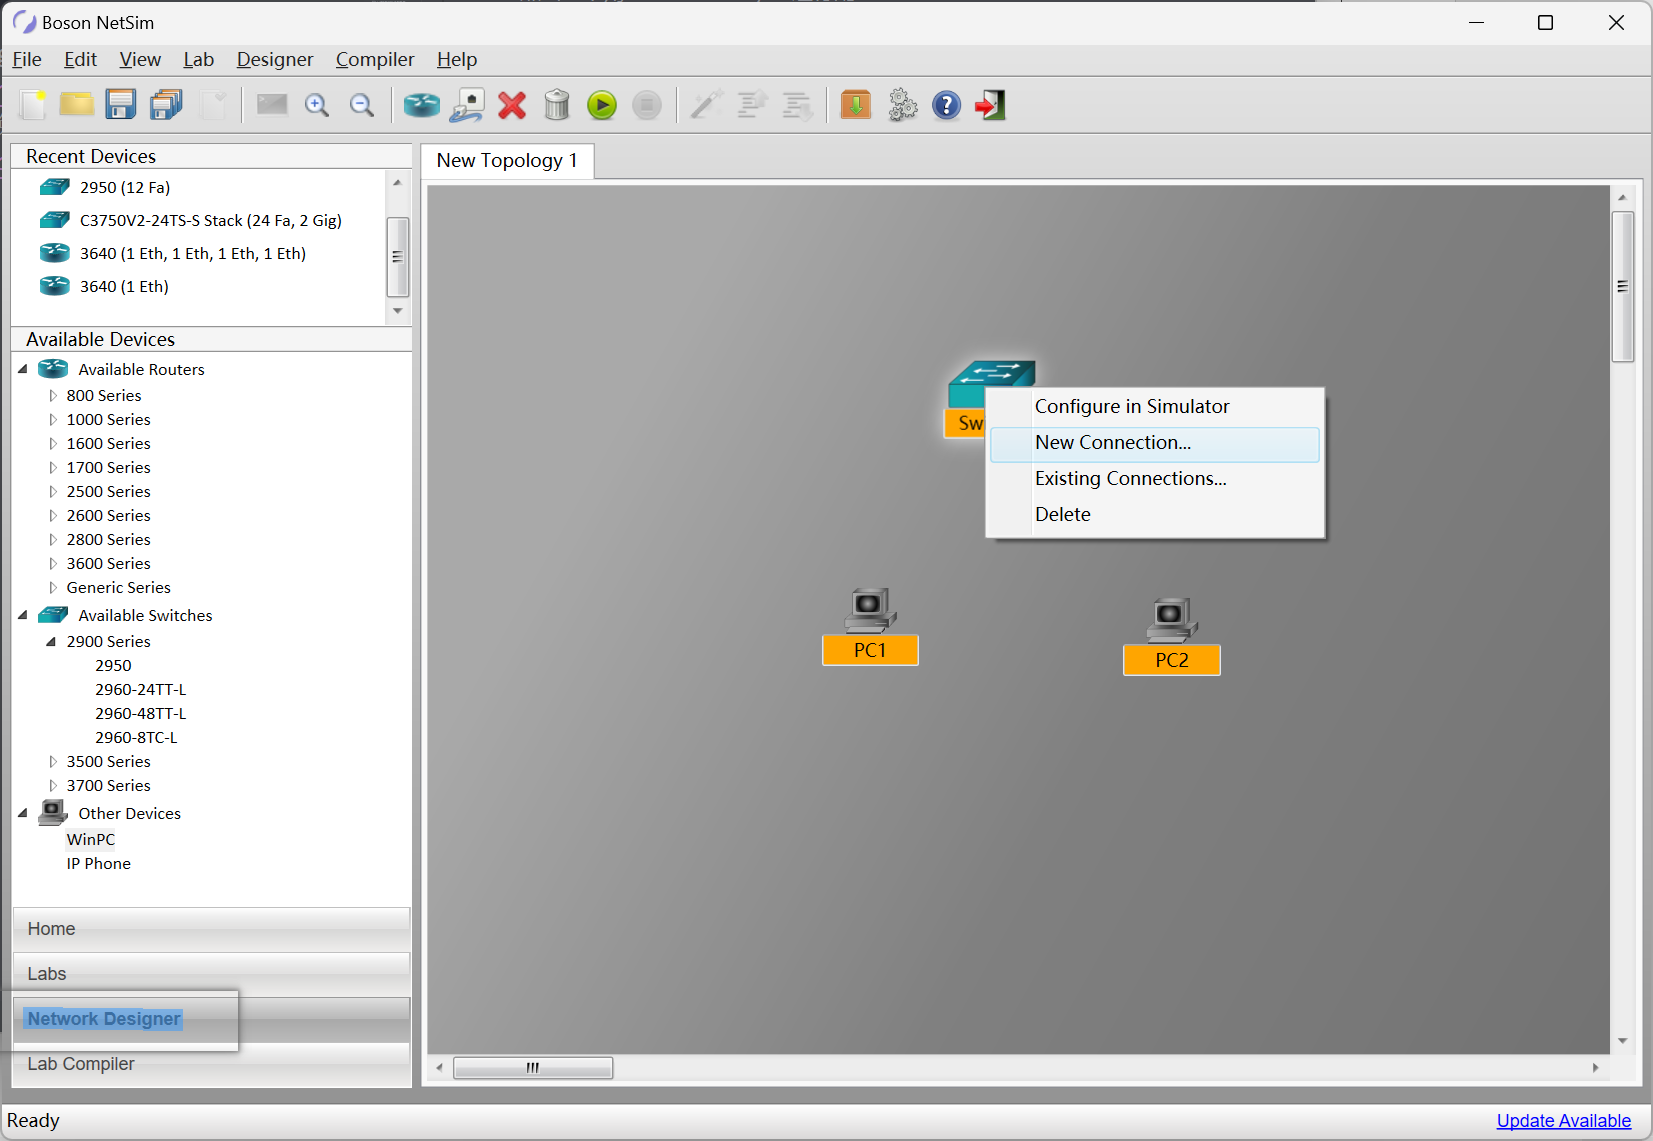
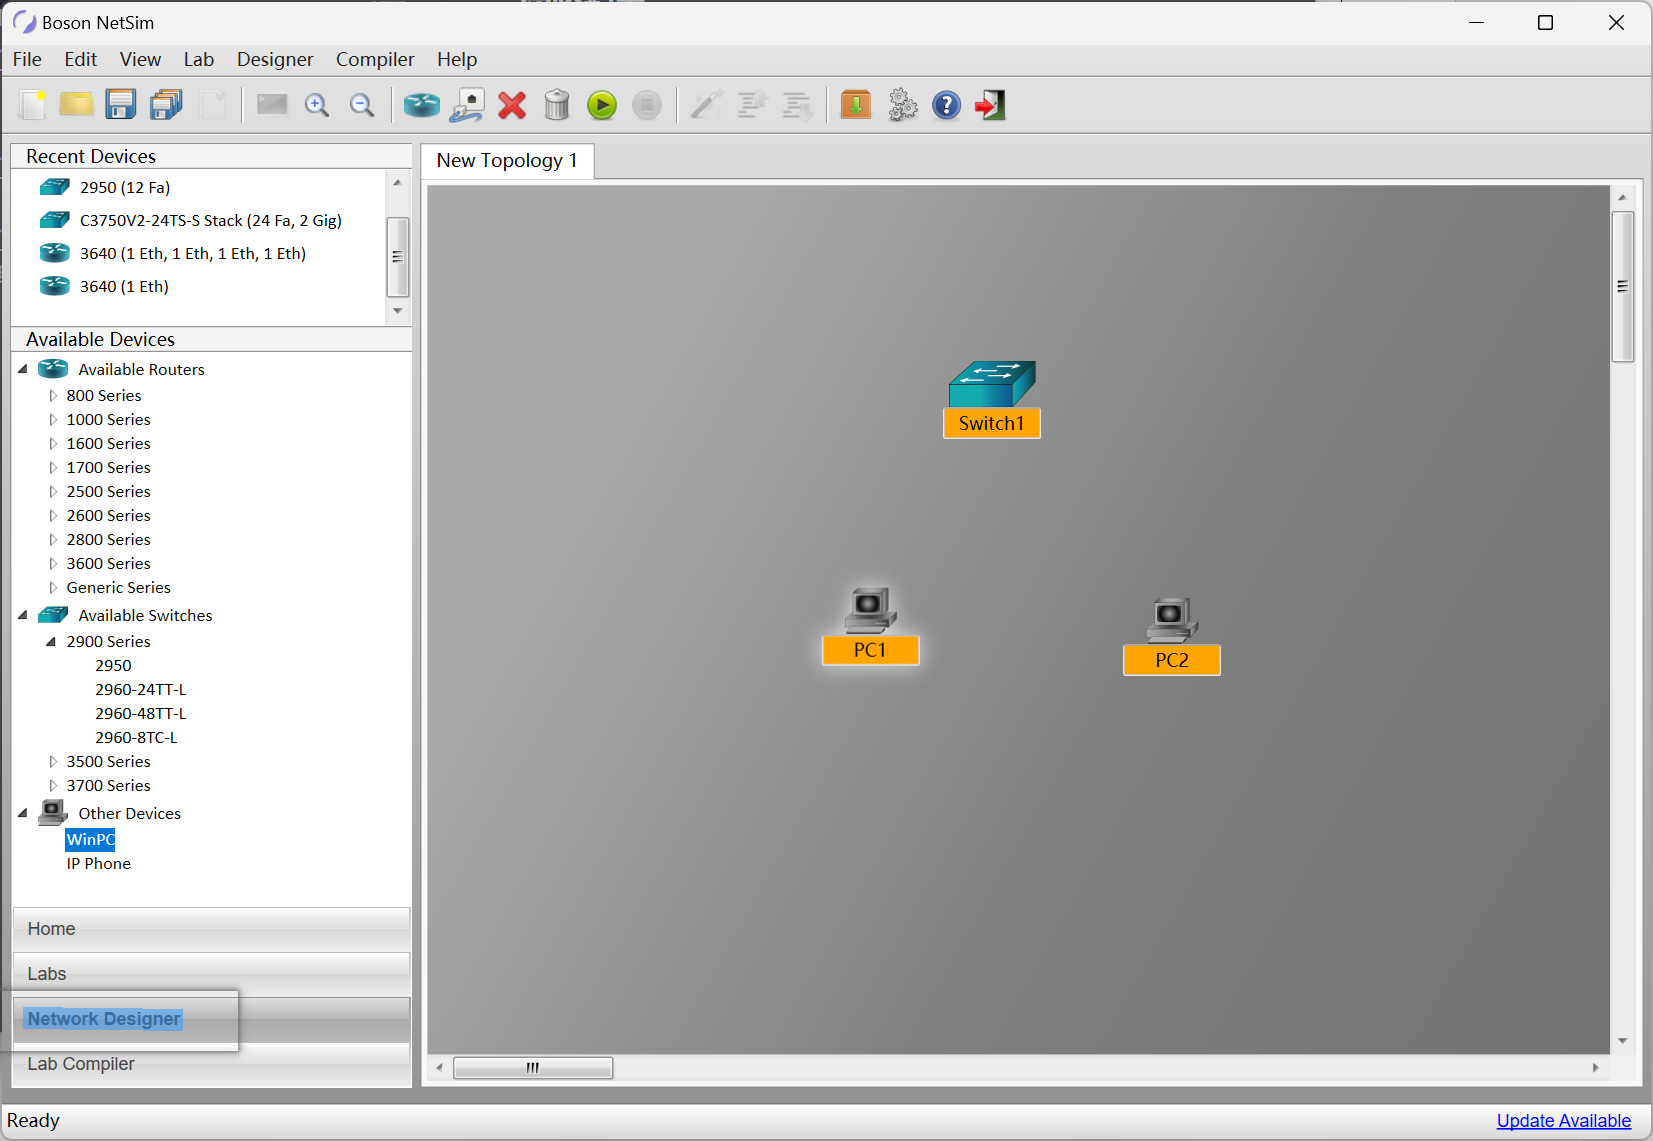 右键交换机 点击New Connection配置线路
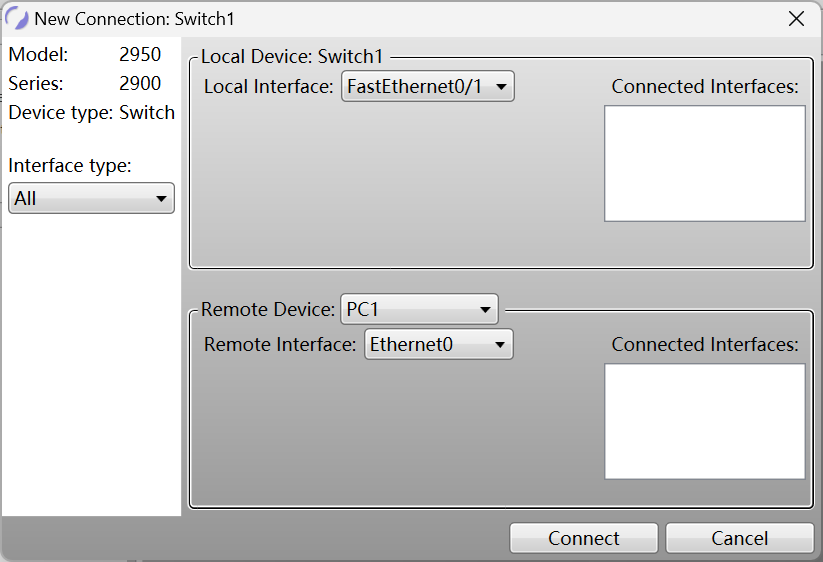
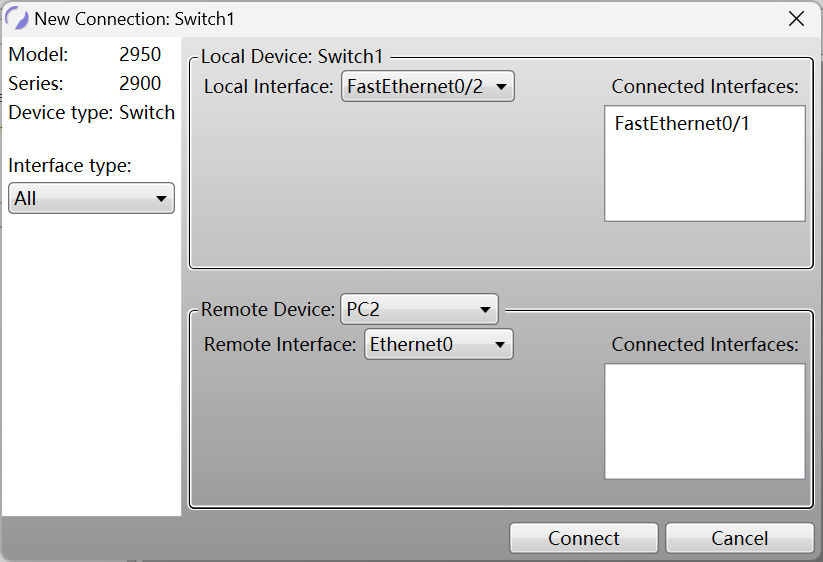
 分别连接两个pc至不同接口
实验配置
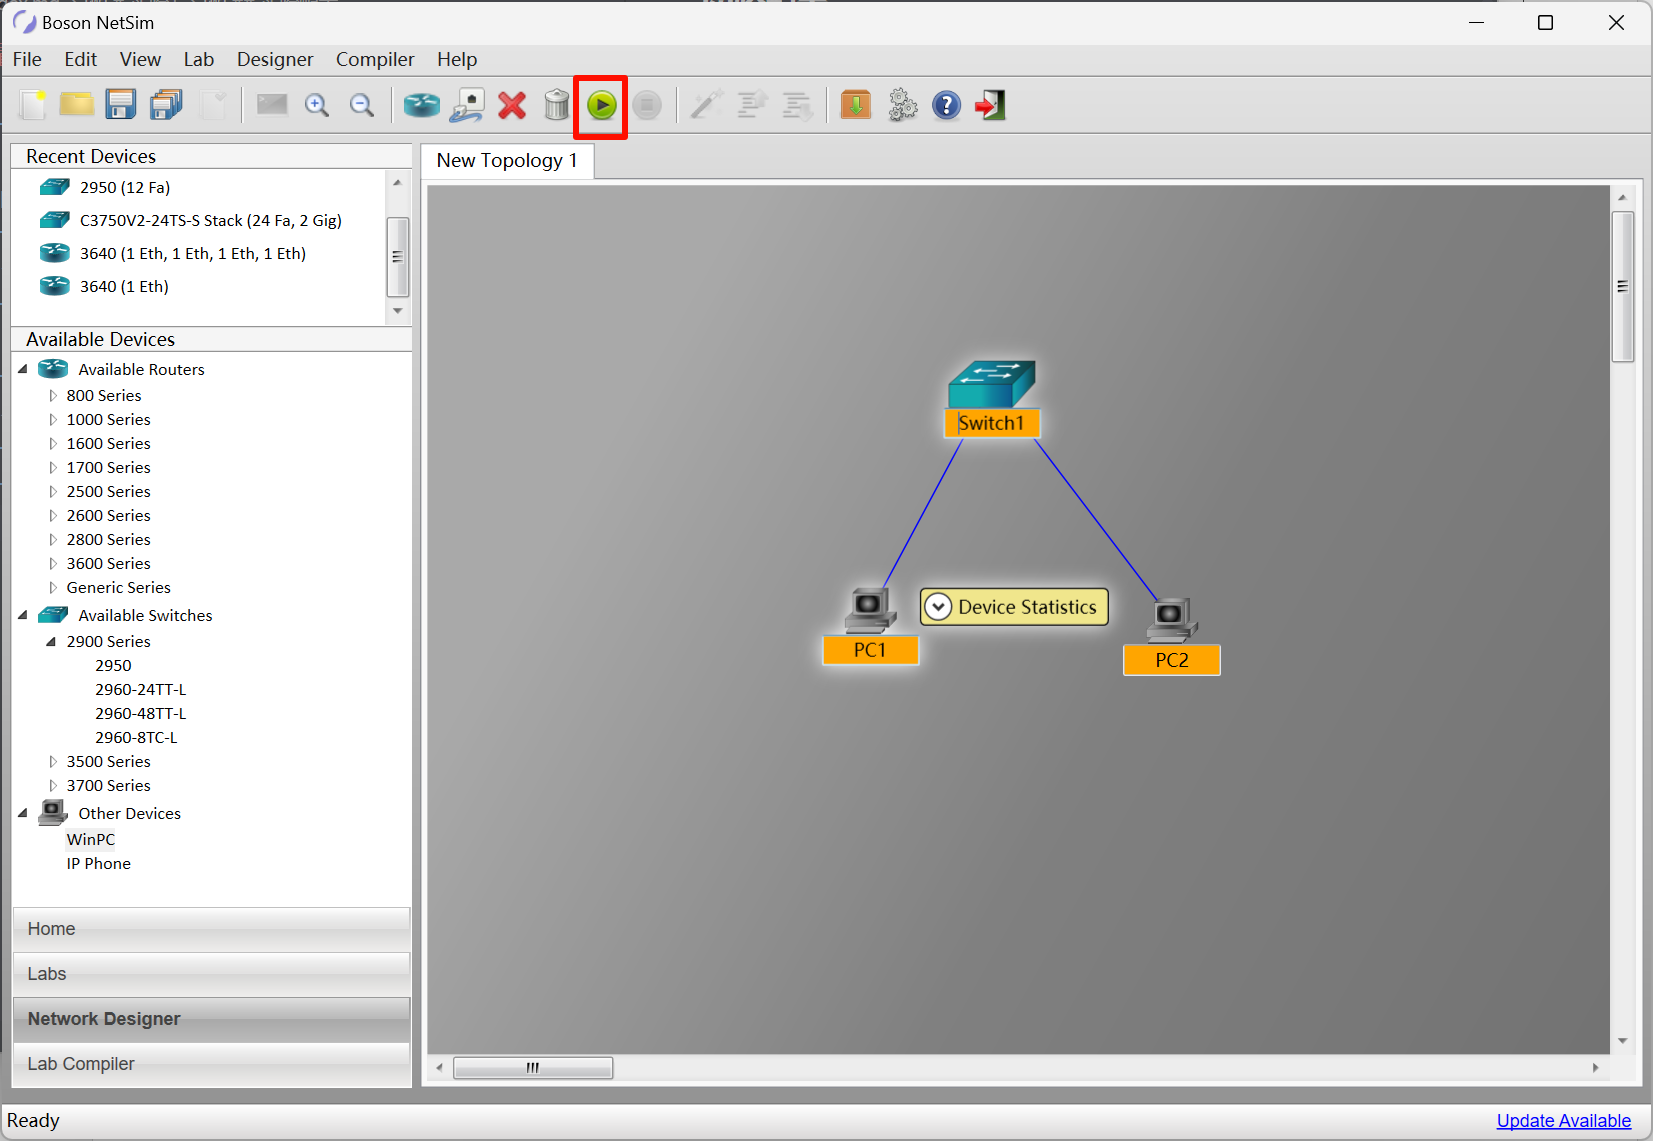
点击按键 进入实验配置
开启switch(y1s1其实不开启也能ping通)
不需要(
在switch1配置界面分别输入
1
2
|
enable //进入特权模式
configure terminal //进入配置模式
|
 根据连接接口开启工作状态
pc1->fe1
pc2->fe2
1
2
3
|
interface f0/1 //进入f0/1端口配置模式
no shutdown //开启端口
exit //退出f0/1端口配置模式
|
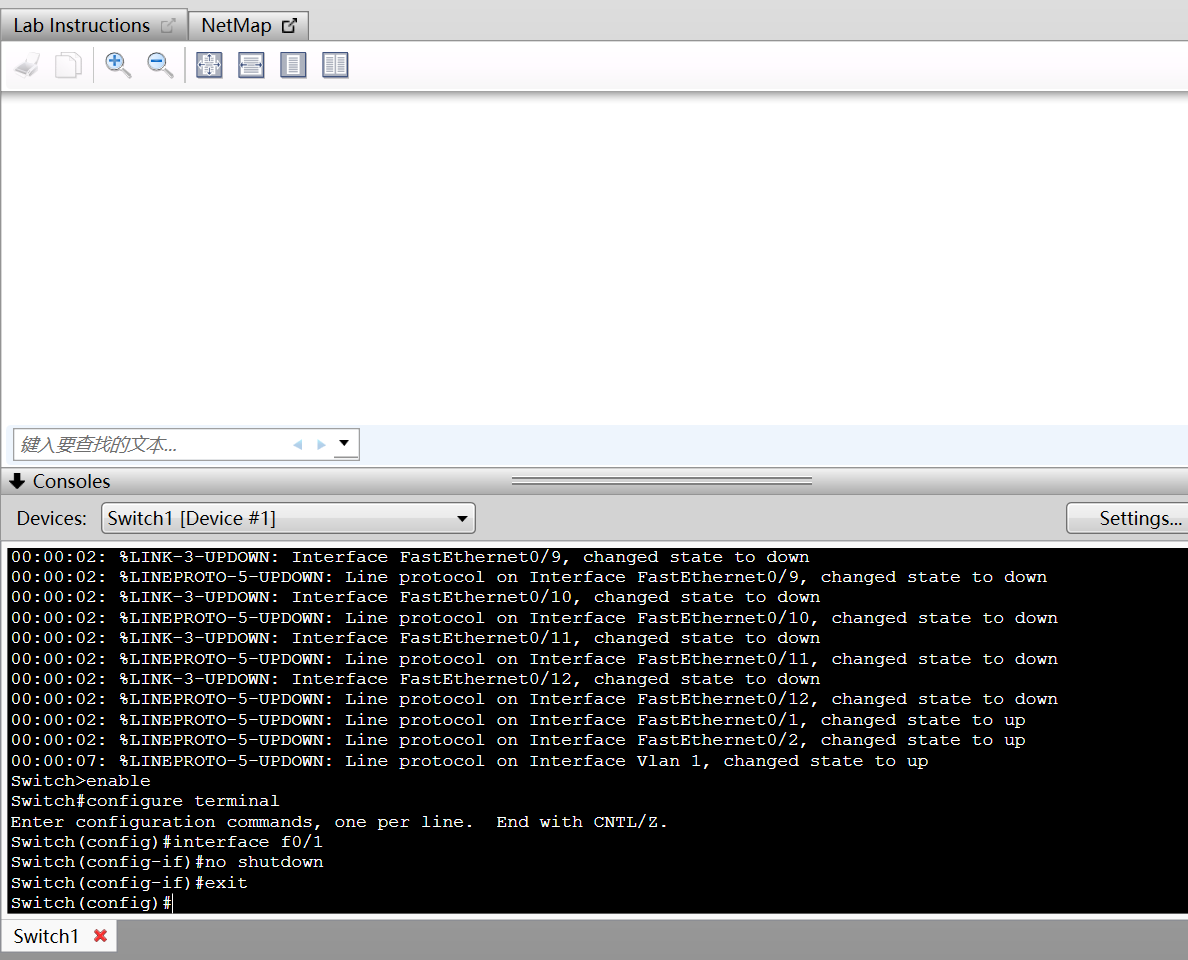 f0/2同理
1
2
3
|
interface f0/2
no shutdown
exit
|
)
pc配置
配置IP地址
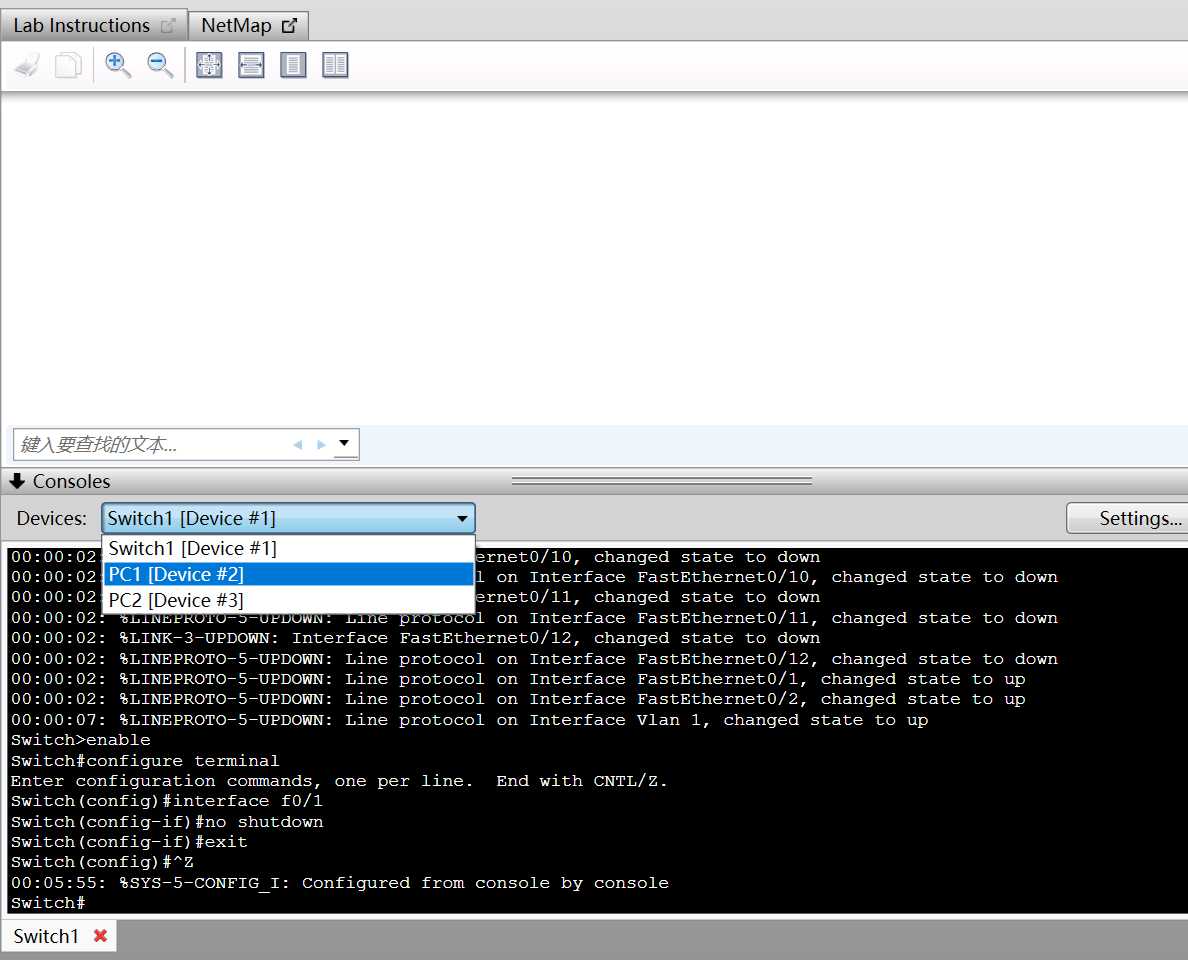
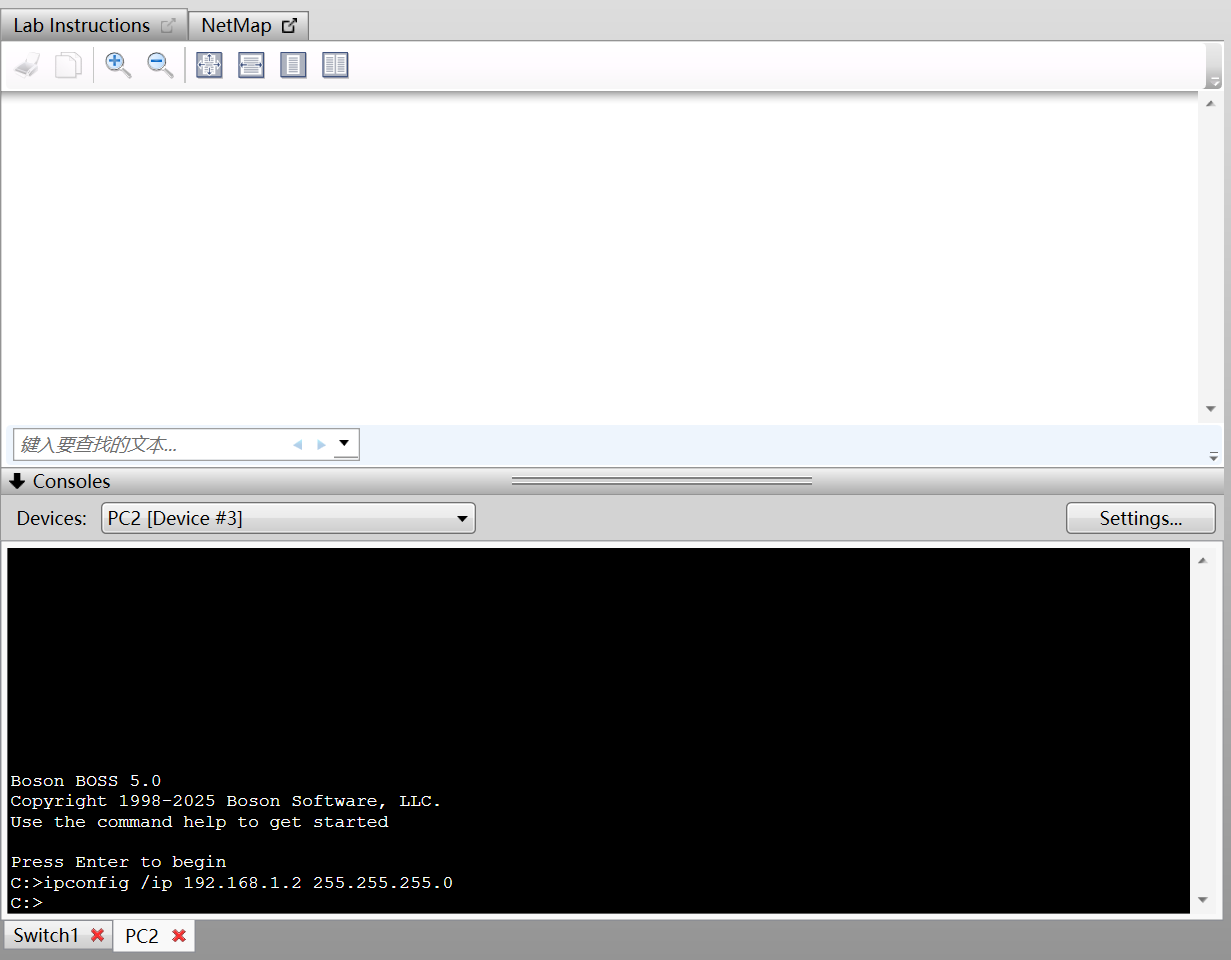
选择pc1进行配置
 输入配置IP地址和子网掩码
1
|
ipconfig /ip 192.168.1.1 255.255.255.0 //事例
|
pc2同理ip地址主机位需变更
1
|
ipconfig /ip 192.168.1.2 255.255.255.0 //事例
|
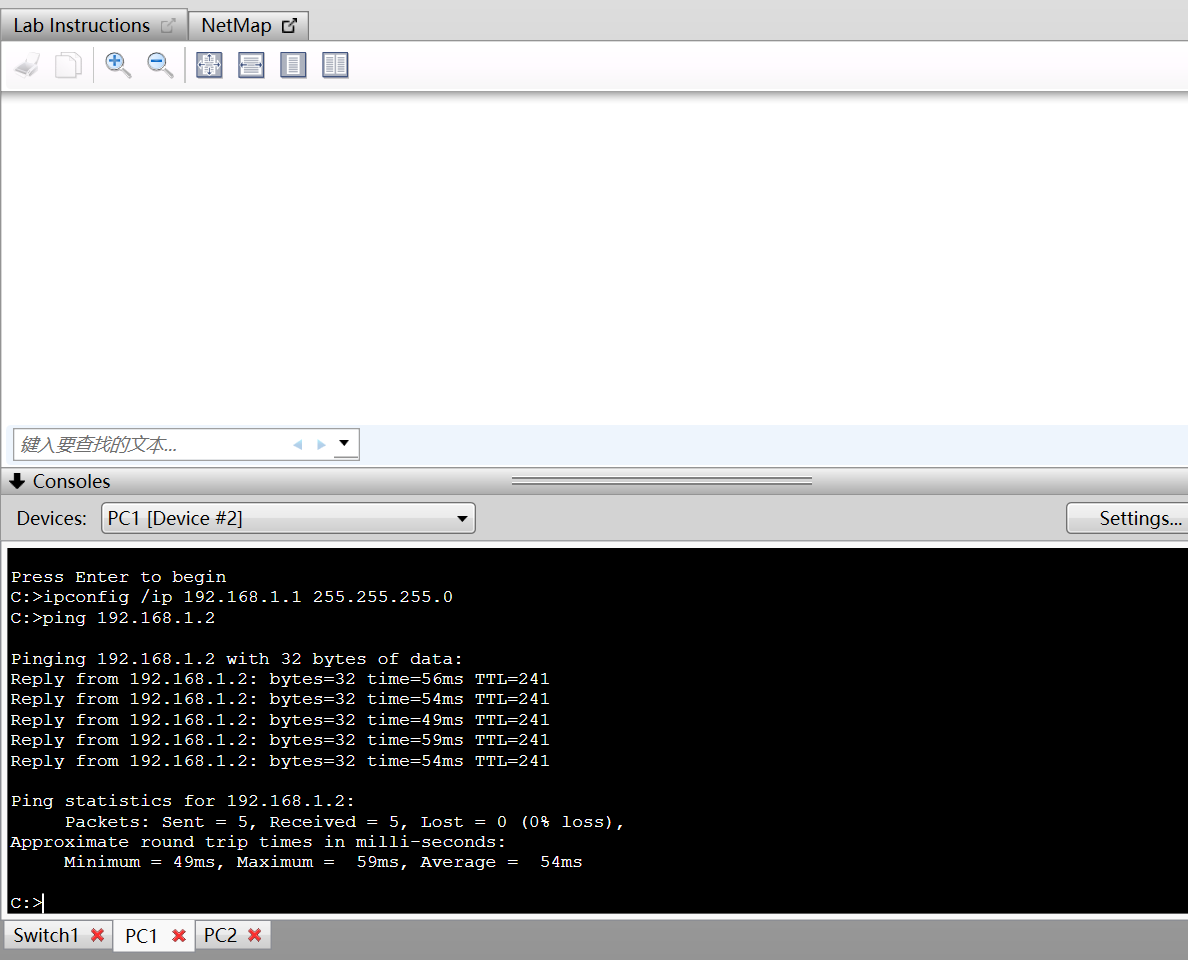
 返回pc1
返回pc1
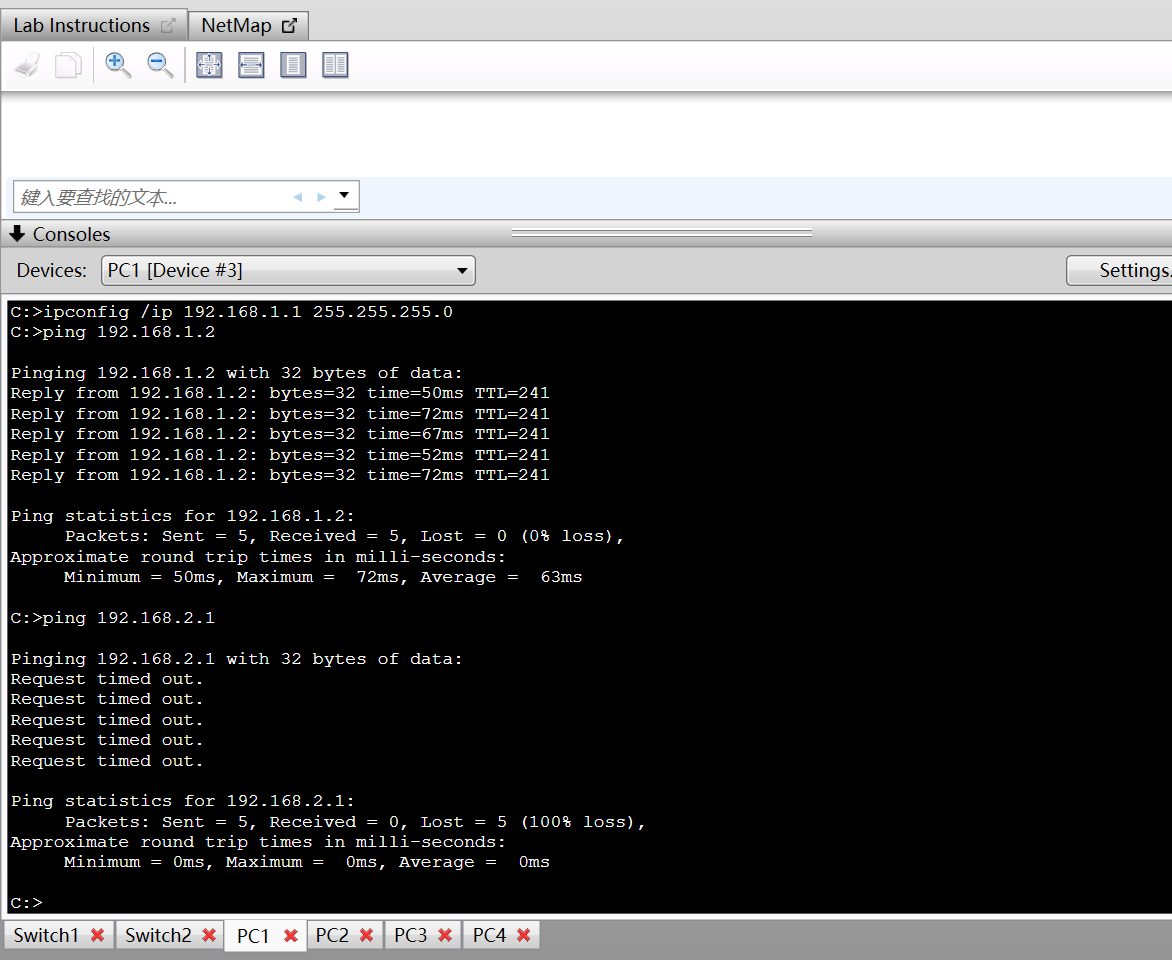
ping pc2测试连接
返回成功确认联通
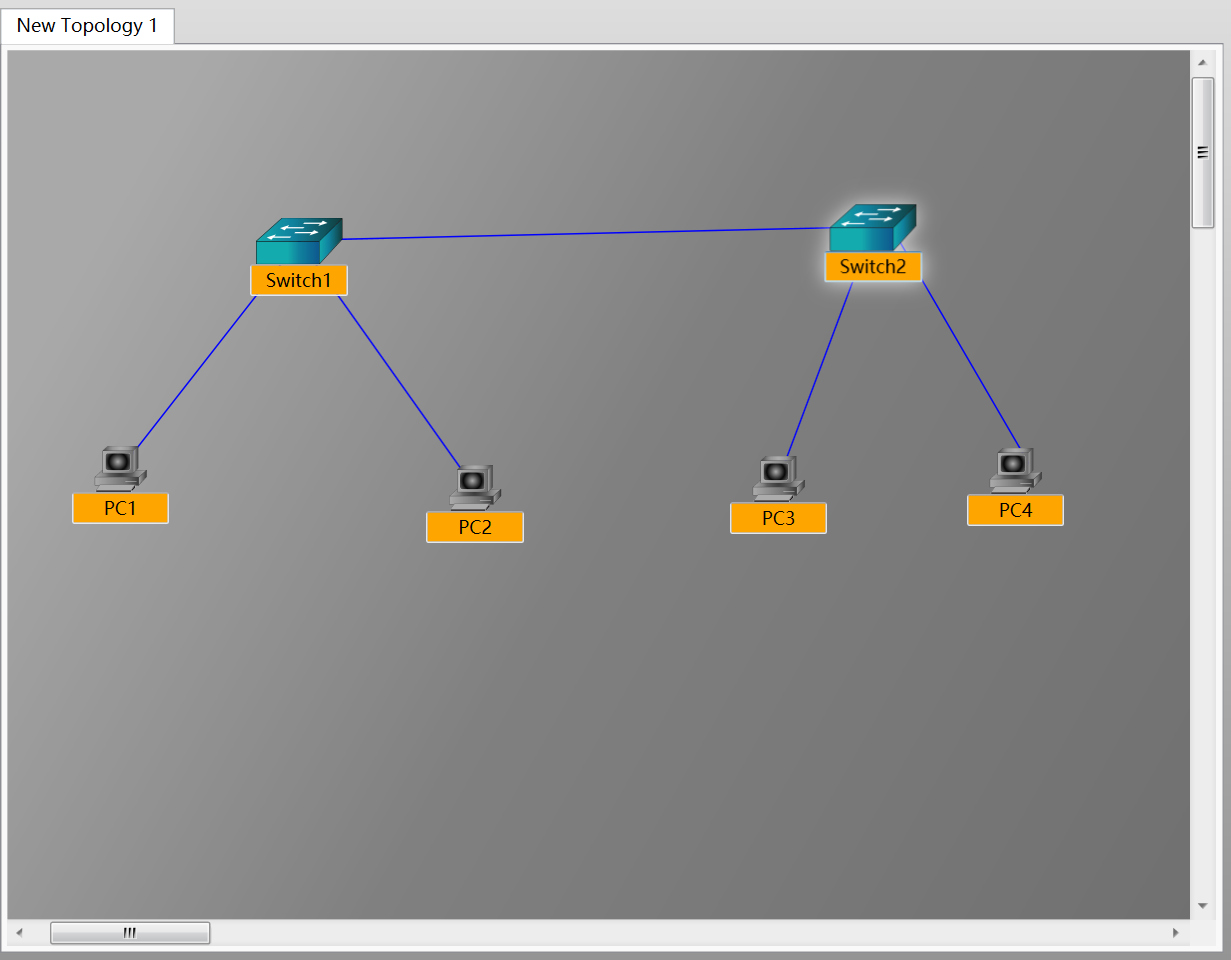
局域网拓展
模型组建
在1基础上添加一组交换机和两组pc
PS:想偷懒可以不加交换机只加pc
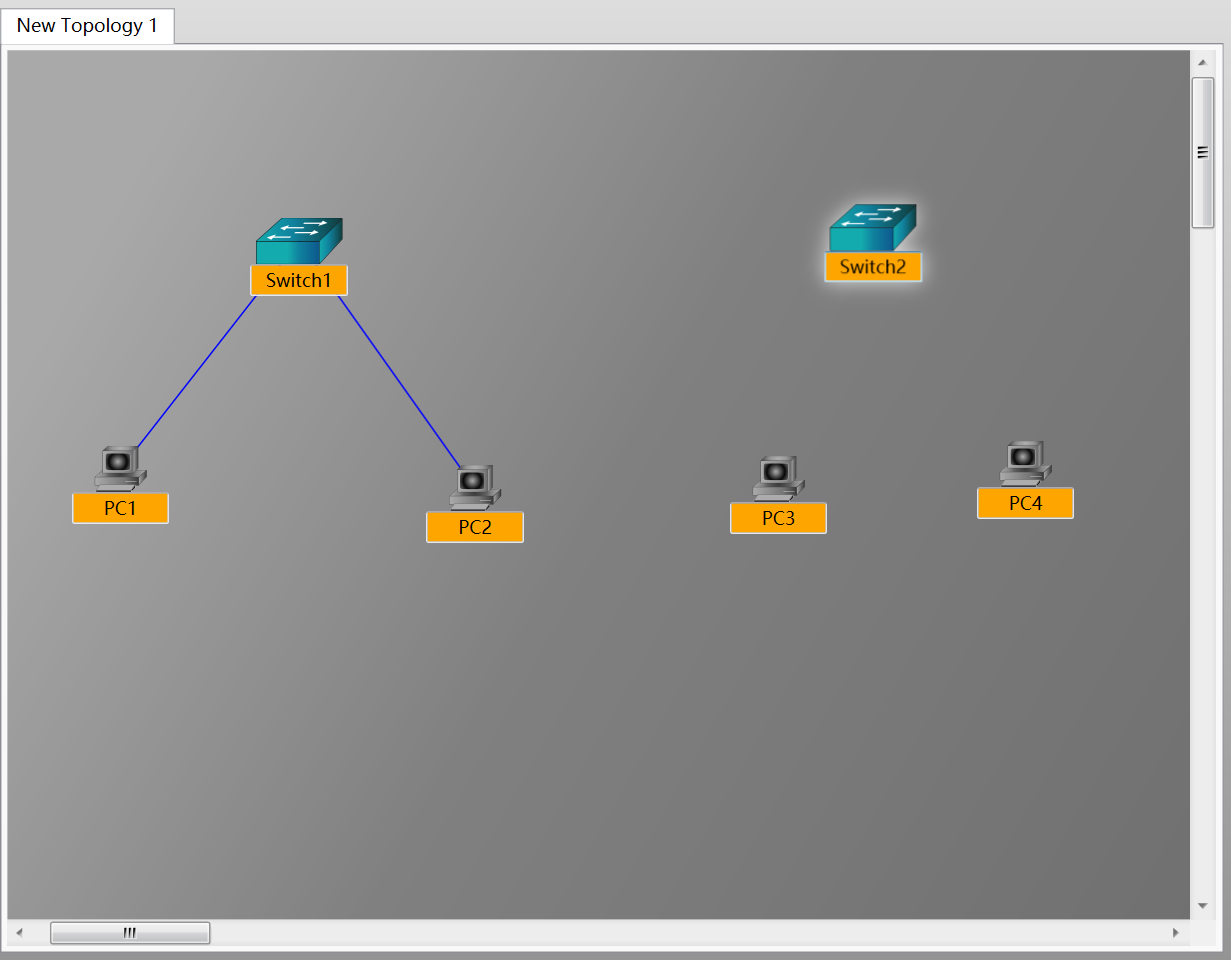 switch2 f0/1->pc1
f0/2->pc2
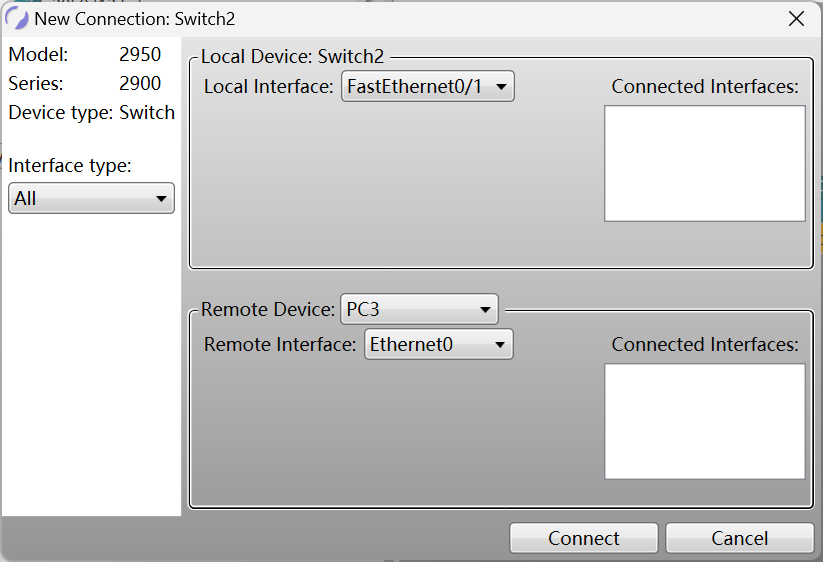
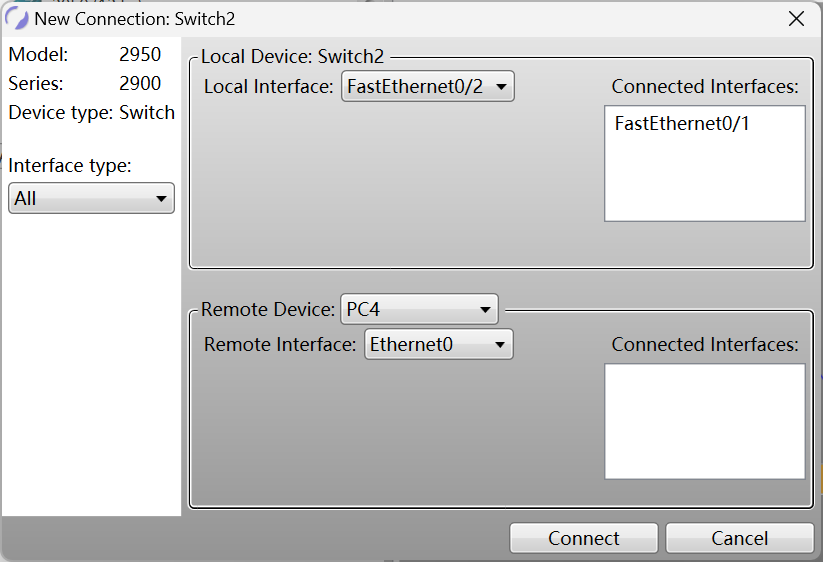
交换机连接
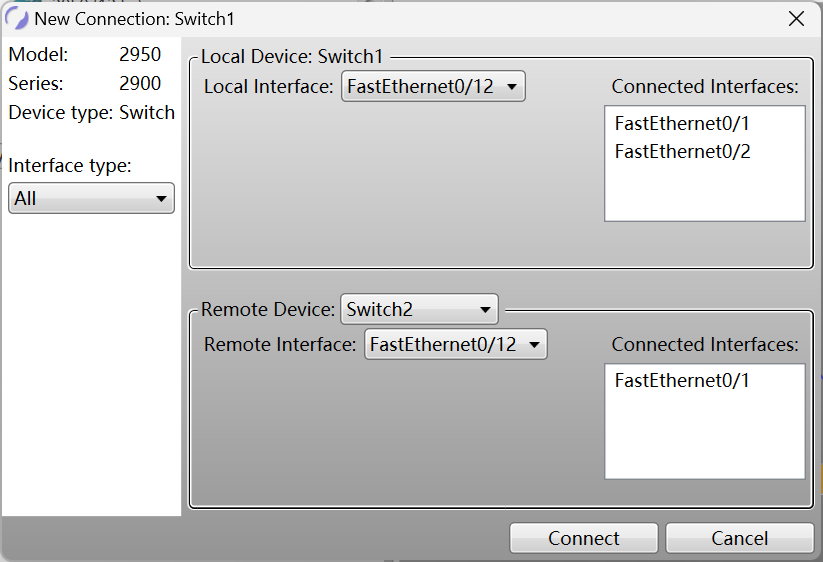 我这里选择将两台交换机f0/12相连
现实中如果有高速吉比特网口优先接高速
实验配置
不需要(
交换机 pc 开启端口略过
 1
 2
 3
 4
 5
 6
 7
 8
 9
10
11
12
13
14
|
switch1:
    interface f0/1
    no shutdown
    exit
    interface f0/2
    no shutdown
    exit
switch2:
    interface f0/1
    no shutdown
    exit
    interface f0/2
    no shutdown
    exit
|
)
pc配置通信
1
2
3
4
5
6
|
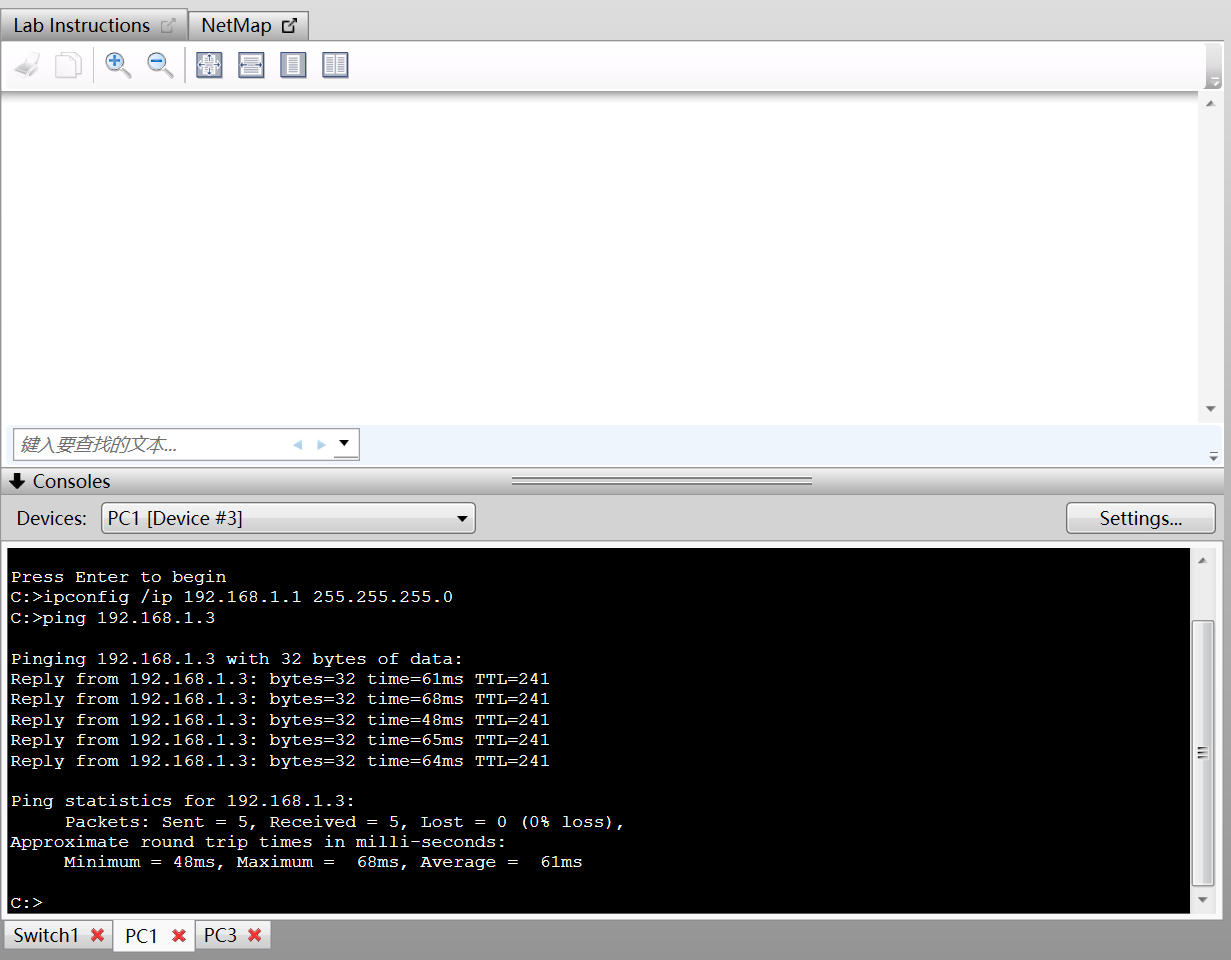
pc1:
    ipconfig /ip 192.168.1.1 255.255.255.0
pc3:
    ipconfig /ip 192.168.1.3 255.255.255.0
pc1:
    ping 192.168.1.3
|
虚拟VLAN
模型组件不变
 略……
略……
实验配置
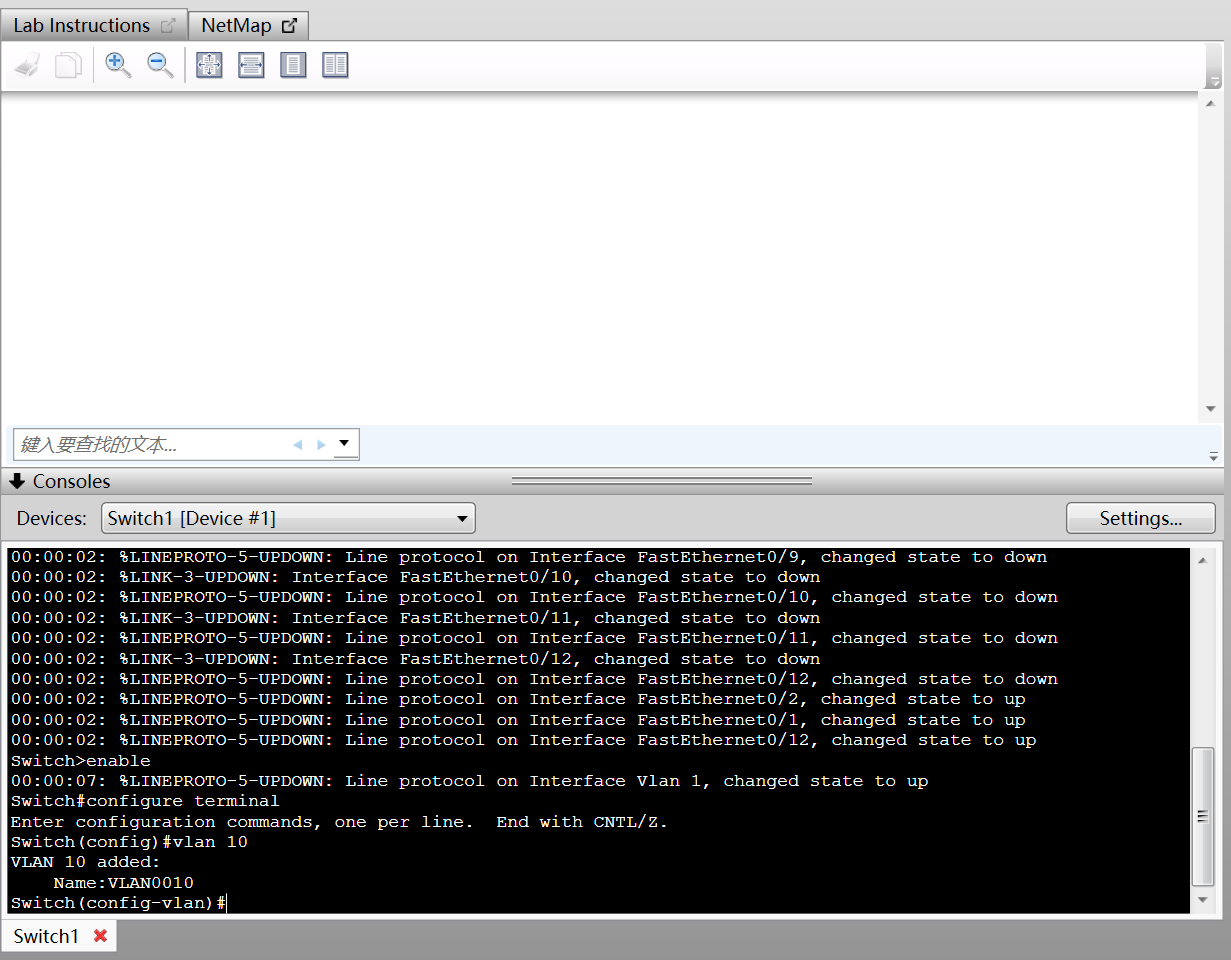
创建虚拟VLAN
进入switch1
1
2
3
4
|
enable
configure terminal
vlan 10
exit
|
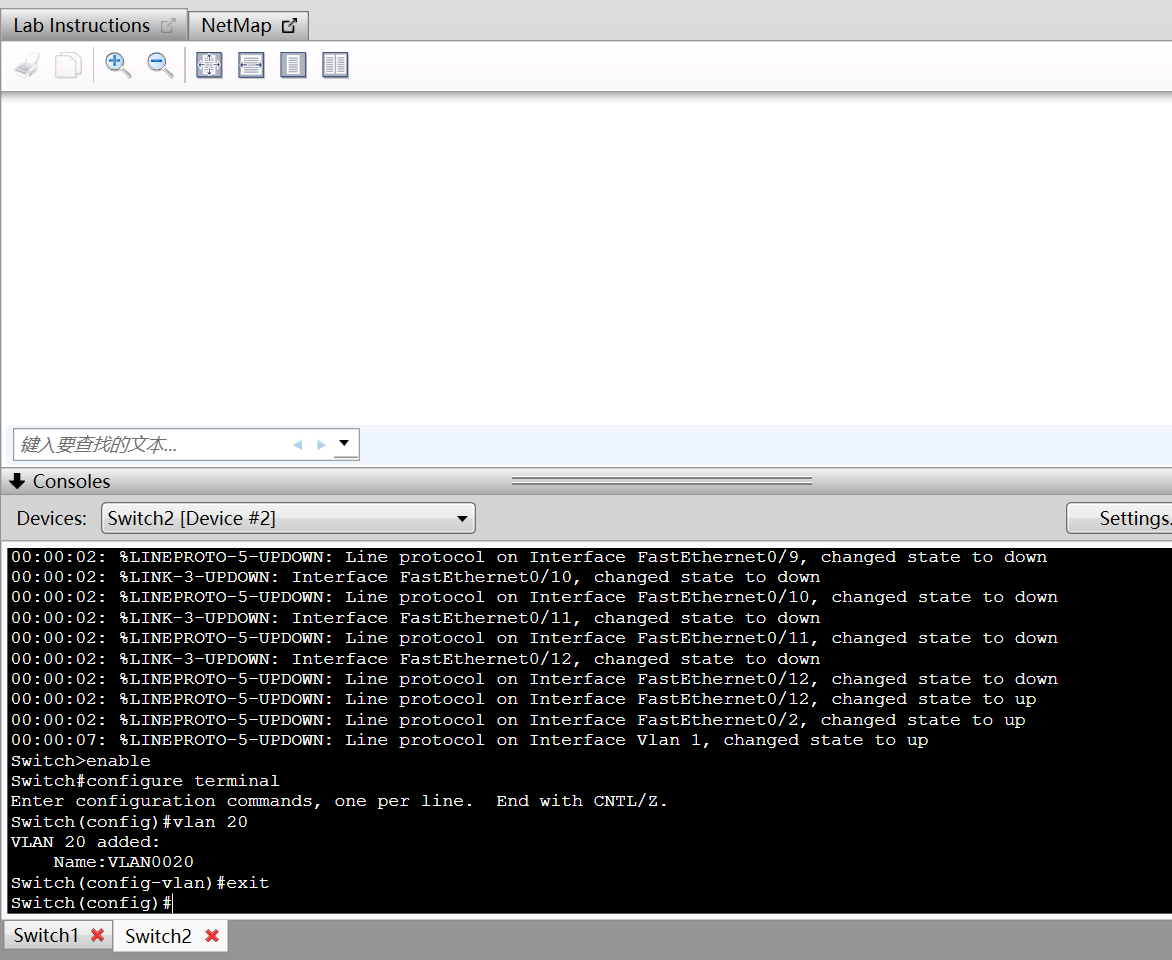
 vlan 20同理
1
2
3
4
|
enable
configure terminal
vlan 20
exit
|
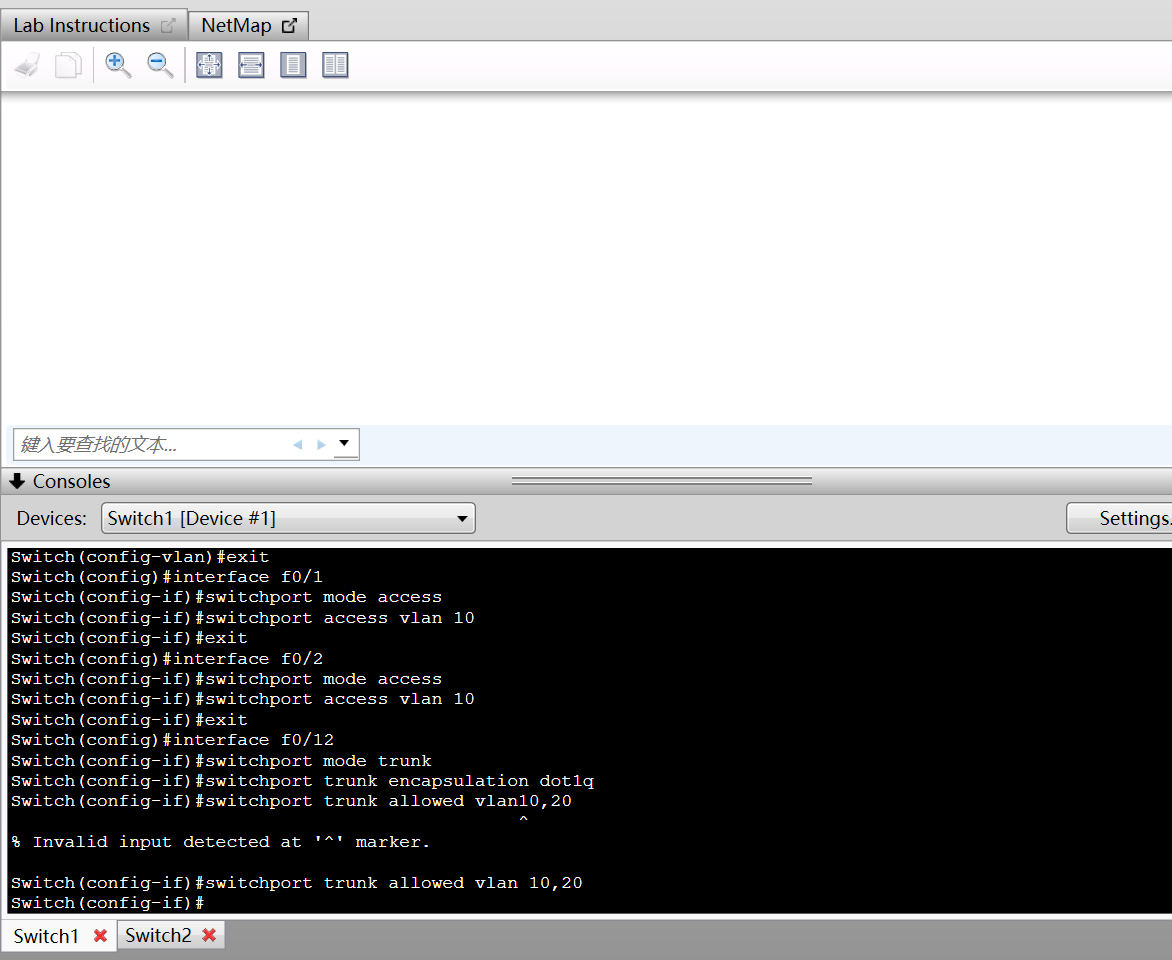
switch1分配VLAN
分配vlan 10
1
2
3
4
|
interface f0/1
switchport mode access
switchport access vlan 10
exit
|
1
2
3
4
|
interface f0/2
switchport mode access
switchport access vlan 10
exit
|
1
2
3
4
5
|
interface f0/12
switchport mode trunk
switchport trunk encapsulation dot1q
switchport trunk allowed vlan 10,20
exit
|
switch2分配VLAN
分配vlan 20
1
2
3
4
|
interface f0/1
switchport mode access
switchport access vlan 20
exit
|
1
2
3
4
|
interface f0/2
switchport mode access
switchport access vlan 20
exit
|
1
2
3
4
5
|
interface f0/12
switchport mode trunk
switchport trunk encapsulation dot1q
switchport trunk allowed vlan 10,20
exit
|
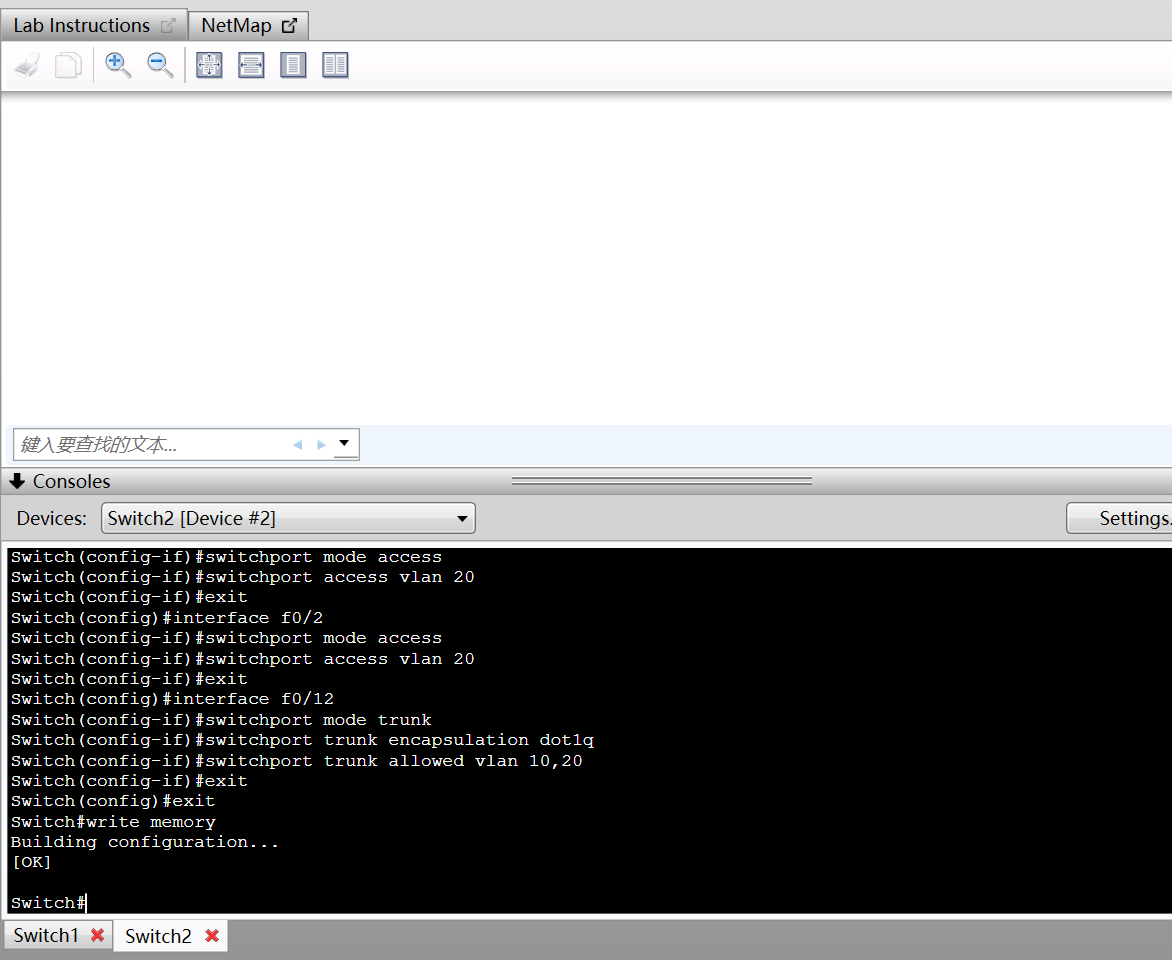
保存配置
1
2
|
Switch1# write memory
Switch2# write memory
|

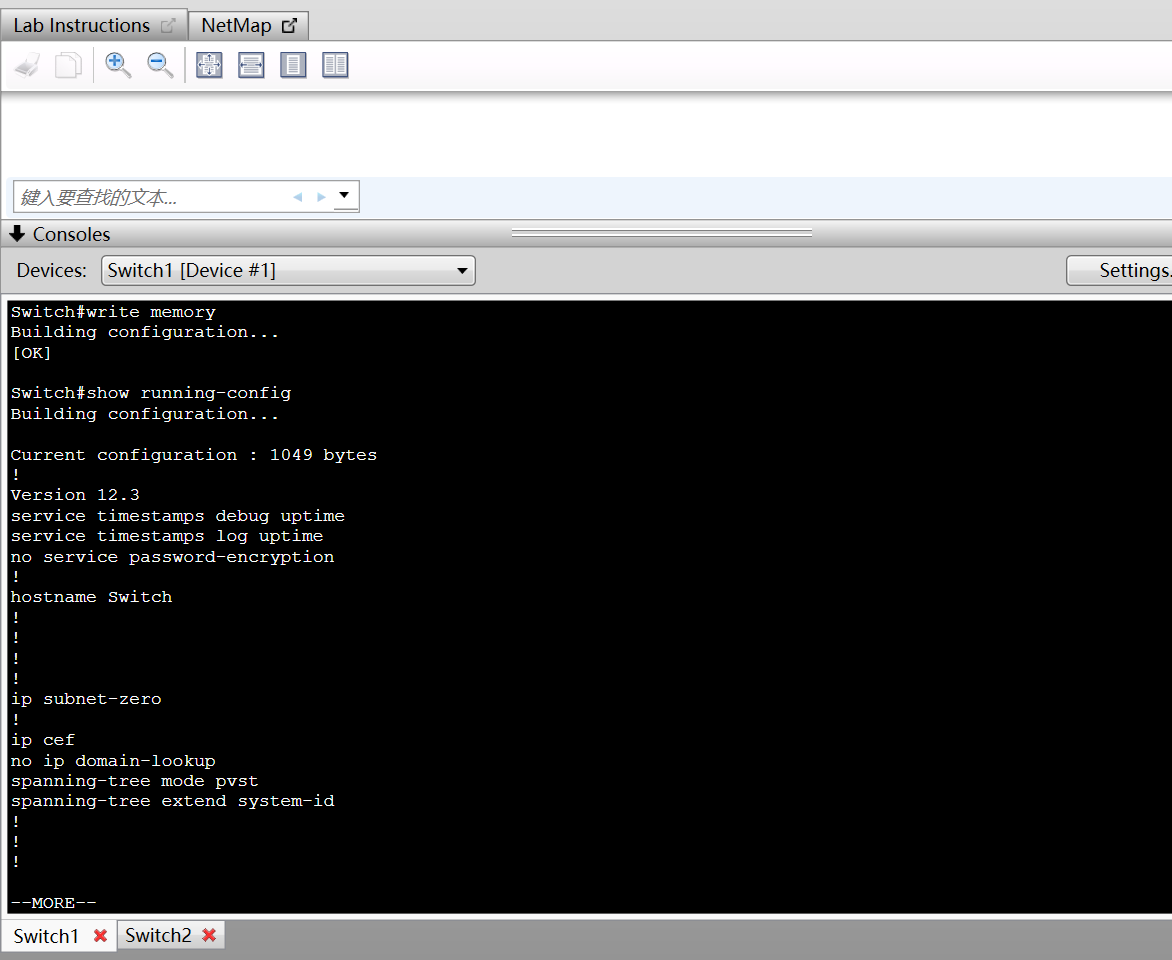
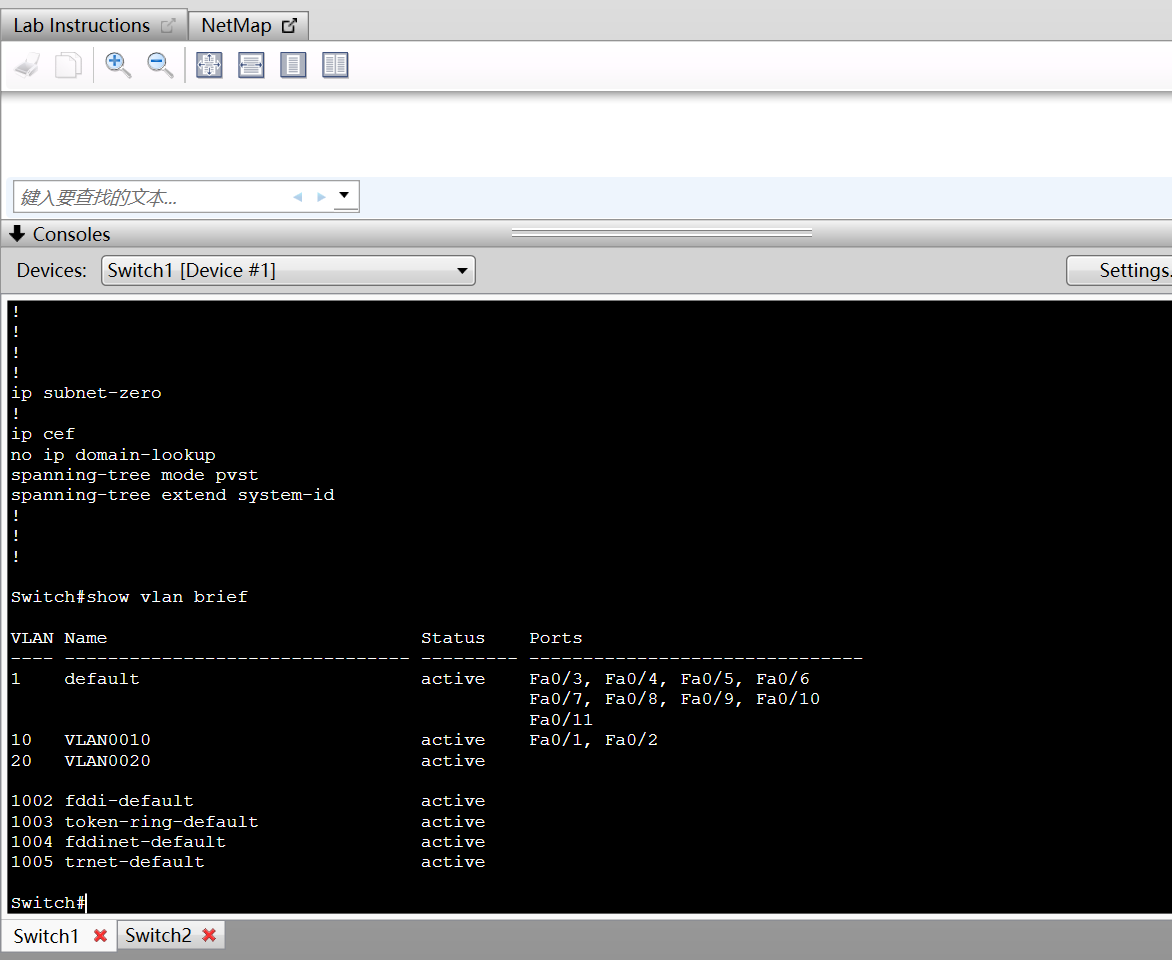
查看配置
1
2
|
Switch1# show running-config
Switch1# show vlan brief
|
pc配置通信
配置pc IP地址
不同vlan间网络位不能相同
相同vlan间网络位相同,主机位不同
 1
 2
 3
 4
 5
 6
 7
 8
 9
10
11
12
|
PC1:
IP 地址: 192.168.1.1
子网掩码: 255.255.255.0
PC2:
IP 地址: 192.168.1.2
子网掩码: 255.255.255.0
PC3:
IP 地址: 192.168.2.1
子网掩码: 255.255.255.0
PC4:
IP 地址: 192.168.2.2
子网掩码: 255.255.255.0
|
相同vlan测试联通
进入pc1

不同vlan测试联通
应显示失败
因为默认情况下 VLAN 之间通信域是隔离的